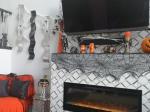
Budget Friendly DIY Fireplace Makeover
This DIY fireplace makeover and living room transformation was super easy and very budget friendly. Not only did I want a cleaner look for this small space, but I also needed more storage space.
The dated fireplace was pretty simple to update with some much needed TLC. I was able to easily update the solid wood mantel for free in just one easy step!
I was able to build the custom built-in cabinets using upcycled cabinets. Bonus!


I was able to update this living room with a DIY fireplace makeover consisting of a budget around $150. You can do it also if you are willing to DIY the heck out of it.
Keep your eye out for used materials on Craigslist, Facebook Marketplace, OfferUp and your local second hand stores.
Here are the supplies I purchased and about how much I spent:
- 1 Gallon primer - $20
- 1 Gallon white paint - $20
- 3 2x4 lumber - $17
- ½” Plywood - $30
- Screws - $9
- 3 used upper cabinets - $30
I already had paint brushes and rollers. But this will be something you are going to need to purchase if you don’t already own some, so you have to add that to your budget fireplace facelift costs.
1. Fireplace Surface Prep
I began by removing the mantel. And for the brick fireplace preparation, I used a dry, stiff boot brush to sweep over the surface of the entire fireplace to knock off and sweep away any loose debris or dust. I then used a vacuum with a hose attachment to clean up the remaining debris.
I liked the original color of the brick inside the fireplace, so I taped off the edges to create a clean line of paint.
 Taping off the fireplace since I like the look of inside of the fireplace.
2. Painting The Bricks
Primer: Use a primer suitable for the surface you’re painting. For a fireplace, a high-quality, heat-resistant primer is best, especially if it’s functional.
Paint: For a non-functional fireplace, you can use regular latex or chalk paint. For functional fireplaces, choose a heat-resistant paint designed for high temperatures.
Because the bricks were so porous, I found that to apply the first two layers of primer was easiest by dabbing the paint on with a brush. This was pretty time consuming and tiring. But after the first layer of primer was on, it became much easier to apply the second.
I applied three layers of white paint using a roller. I used a paint brush to paint in between the bricks and touch up any particularly large pores.
Follow the manufacturer’s instructions for drying times.


3. Updating The Mantel
While the last coat of paint was drying, I went to work on the mantel. Fortunately the existing mantel was already a solid wood piece. The front edge of the existing mantel was a raw edge with the bark still intact. While this certainly is a popular look, it was not the look I was going for.
I used my circular saw to cut the raw edge off. Because my saw couldn’t cut deep enough to take it off in one pass, I had to flip it over in order to cut the rest of the way through.
[CAUTION: If you feel you cannot accomplish this task, be sure to always be safe and ask for someone who is capable of accomplishing this for you. Safety first!]
You can also find these types of pieces of wood at local saw mills and even the big box stores now carry them, with the raw edge in tact.


Because I didn’t line up the saw precisely with the first cut, I was left with a seam all the way down the front edge. I could have sanded it down, but instead just ended up using this as the back edge, making the previous back edge become the front.

4. Installing Built-in Cabinets
I found three upper cabinets at a thrift store for $30. After sanding them down, I primed and painted them with the same white paint I used for the fireplace.
I primed and painted the 2x4s and used them to build a base for the cabinets to sit on since they would have been too low to the ground as they were.

5. Installing Cabinet Tops
I had the ½” plywood cut to size at the hardware store so all I had to do was prime and paint it before installing it to the tops of the cabinets.
I created a small open bookshelf to the far right of the built-ins using scraps left over from the countertop plywood.

6. Finishing Touches
- Inspect and Touch Up: After the final coat of paint has dried, inspect your work and touch up any areas that need it.
- Apply a Topcoat (Optional): For added durability, especially on a functional fireplace, you might want to apply a heat-resistant topcoat. Follow the manufacturer’s instructions for application.
7. Remove Tape & Clean Up
- Remove Painter’s Tape: Carefully remove the painter’s tape before the paint is fully dry to avoid peeling any paint away with it.
- Clean Brushes and Rollers: Clean your painting tools according to the paint type you used (water for latex, solvents for oil-based paints).
8. Allow to Cure
- Cure Time: Allow the paint to cure fully before using the fireplace. This can take several days depending on the paint and conditions.
Voila! A Budget Friendly DIY Fireplace Makeover!

If you have any specific questions or need more details about any part of the process, feel free to ask.
If you have also completed a DIY fireplace makeover, please share it with us, we would love to see and share it with our readers.
Share Your Thoughts or Project
Do you like this project? Do you have anything to add to it? Have you done a project similar to this? Using my methods? Please share your DIY project or add your comments for all my visitors.

|
|
|
|
|
|
|
Newsletter
June Tailor and Quilt As You Go sewing kits
Since 1961, June Tailor has been developing and manufacturing innovative products for pressing, cutting, piecing and quilting for all levels of sewists from novice to advanced. June Tailor has it all!
Sewing & Cutting Cabinets
The perfect solution for any sewing room! Choose from hundreds of sewing cabinets, cutting tables and sewing chairs with features like rolling caddies, dedicated storage, multi-position lifts and more. Go here to find yours!
TRADE UP AND GO!
How Does It Work?
Trade in your GO! Me or GO! fabric cutting machine to get a great deal on a new fabric cutter!
Step 1
Select your trade-in fabric cutter model and credit method and purchase a Fabric Cutter Trade Up Set.
Step 2
Use the shipping label included with your new fabric cutter to send us the trade-in fabric cutter. Please follow all instructions provided in your confirmation email.
Step 3
Get your trade-in credit once we receive and validate the trade-in fabric cutter.
Go here to learn more!

Recent Articles
-
DIY Fireplace Makeover
Oct 03, 24 12:16 AM
 Make your space stunning with the DIY Fireplace Makeover that is also budget friendly.
 -
Less stressful Way to Purchase Traditional Middle Eastern rugs
Jul 10, 22 06:03 PM
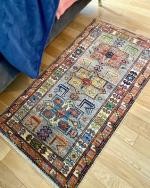 I have always found the purchase of a traditional Middle Eastern rug to be a stressful experience as they are a huge investment. But they are so beautiful
 -
Seasonal Decoration Changes
Feb 27, 21 05:34 PM
 I am in the later half of my life. I have always dreamed of having a home that was a neutral background and I could use artwork and decor to change the